With our auto-edit feature we’ve reimagined how editing real estate videos should work. Enabling the auto-edit feature will save you lots of time, since Iveo Pro does all the work for you. If needed, Iveo Pro will automatically trim your shots, for example when it recognizes some unusual shaky movements in the beginning or at the ending of the shots. This results in even more smooth and dynamic real estate videos.
How does this work?
There are two options in order to make use of the auto-edit feature. When uploading a shot to the Iveo web dashboard, you’ll find an auto-edit button next to the shot that shows if auto editing will be applied to that shot. You can disable or enable the auto edit feature for any shot here. If you’re already convinced by our auto-edit feature and want all your shots to be edited automatically, you can set this in your preferences:
1. Click on your username in the Iveo dashboard
2. Go to > Account settings > Edit preferences
3. Select “Auto edit always on” and don’t forget to click on “save”

Great, you’ve set your auto-edit preferences. When you make a new video, your shots will be analyzed automatically and our auto-edit feature will decide which parts need to be trimmed. When your video is ready you can see the result in the video.
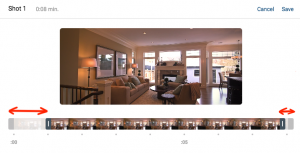
You can also see what auto-edit has trimmed if you click on the “edit” button of a shot. You can see this after your videos have been made, or if you wait until all your shots have been analyzed (although you have to be a bit more patient). If you want to, you can change the edit manually and make the video again.
Iveo Pro recognizes the rooms in your shots and decides how to trim your video based on this information. Watch how this works!